
Preparing your home for sale is a big job. There’s a lot of work involved and it can seem overwhelming at times. With such a big to-do list, it’s tempting to skip some of the little things. But, if you want your home to sell quickly and for the best price, don’t neglect the details! KT Team advise the following!
Everything looks better (and newer) when it’s clean. So be sure to wash the windows, steam the carpets and drapes, wash the floors, and make the bathroom shine. A potential buyer will be extra critical when looking at your home and they will notice the little things that you may not think of.
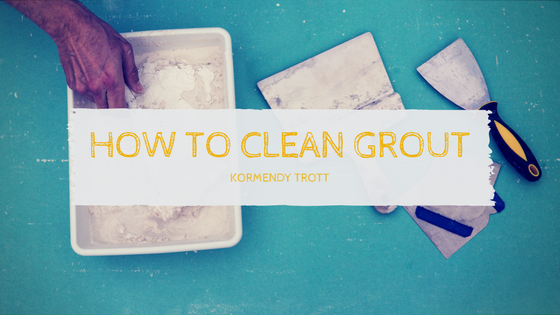
An area that often gets missed during the deep clean is grout. It’s a little thing that you look at every day and might not even notice. But dirty grout looks terrible and really stands out on a clean floor.
What is the Best Method for Cleaning Grout?
We often recommend to sellers that they clean the grout in their home before listing it. As a result, we frequently get asked what the best method is for cleaning grout.
Whenever possible, we like to use natural cleaning solutions. They’re better for you and your family, and for the environment. Our favourite method is to mix one part water to three parts baking soda. This will make a paste that you can apply with a finger.
After applying the mixture to your grout, spray it with vinegar to activate the solution. Let it sit for a minute and then scrub it with a toothbrush or other stiff-bristled brush. After scrubbing, wipe away the mixture with water and a clean cloth. You should have nice clean grout as a result.
If your grout is stained, you may have to to take a second pass with a stronger cleaner. Hydrogen peroxide works well and is available in most drug stores. Really tough stains and grime may require a commercial cleaner. But only do this as a last resort, since toxic cleaners can erode grout over time.
Don’t Forget the Caulking
Once you’ve cleaned the grout, old and dried out caulking will stand out. This is another quick fix that you can do yourself. Use a sharp tool to remove the bulk of the caulking. You may need to go over the area again with a scraper to ensure all of the old caulking is removed.
After the caulking is gone, clean the surface and let it dry completely. Mask off the area you are going to caulk with painters tape. Apply the caulk evenly along the masked area. Smooth out the line of caulking with a wet finger or an ice cube. Remove the tape before the caulk is dry, and be sure to wait at least 24 hours before allowing any water to come in contact with the new caulking.
Now that you have clean grout and new caulking, your tiles will look their best. To finish preparing the bathroom, polish fixtures, vacuum vent fans, replace burnt out light bulbs, and put away personal items.
Grout Cleaning Solution and Instructions:
“What do you guys recommend for cleaning the grout in between the tiles?”.
This is a great question because we run into this problem all the time. Many homeowners neglect these fine details, and they are really easy to fix. We’re also big advocates of trying to use natural cleaning solutions whenever possible. Here are the step-by-step instructions:
- Make a paste with 1-part water to 3-parts baking soda
- Apply the paste to the grout with your finger.
- Once applied, spray it with vinegar to activate the solution. Then, let it sit for a minute.
- Scrub it with a toothbrush or other firm-bristle brush
- Wipe it clean with a cloth, and voila – Clean Grout!